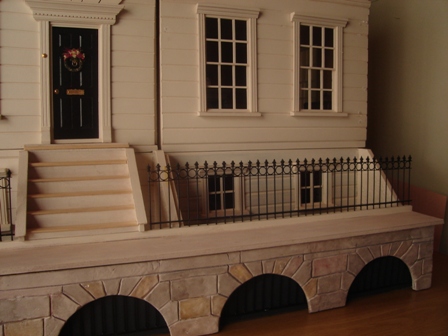
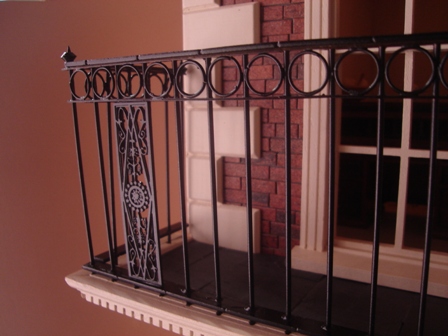
How did I do it? Railings
I was always determined to have good-looking metal railings outside my dollshouse but could not afford the ones I really aspired to by Ironworks / Black Country Miniatures. Furthermore, I wanted to be able to say I had made them myself and I DID want to make them myself.
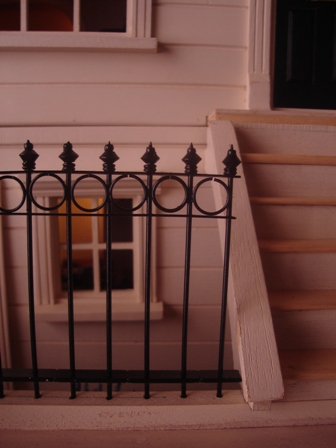
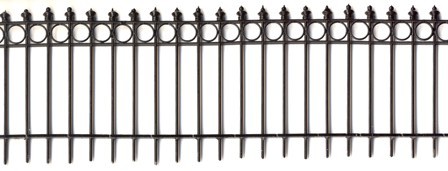
I had pondered designs and methods for a long time (years!) especially how to make the filial on the top. Finally last year whilst in Boston I saw the simple but exact design I wanted and took a photo. Who but miniaturists takes photos of railings while on holiday? (The year before I had taken photos of chimneys and while in Bath – the pavings on the streets!)
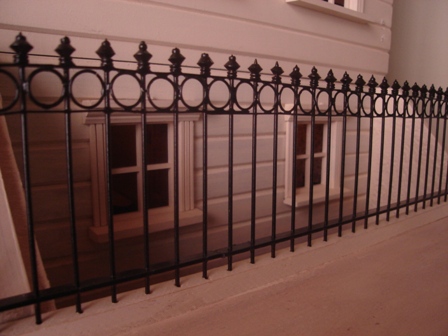
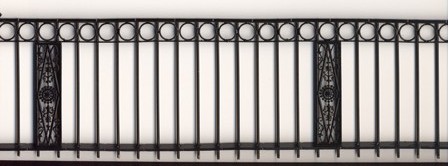
I wanted to use metal and I wanted to solder them. I ordered 2 components from Black Country Miniatures – the 4 fancy panels which would go on the top balcony railings and I ordered the thin strips of brass with ready drilled holes to receive the rods. Not shown on their website but you can ask them. http://www.ironworksminiatures.co.uk
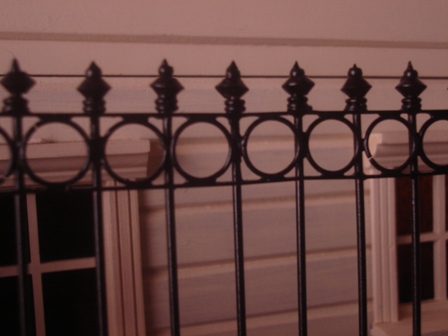
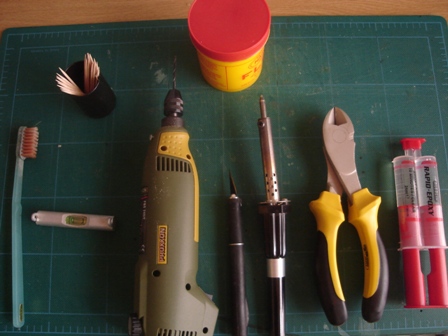
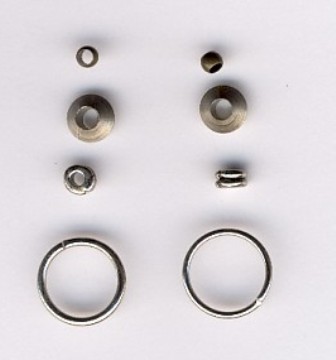
A tip from a book suggested brazing rods for the uprights, which I bought, but the breakthrough came with a visit to a bead shop. I bought a whole selection of metal beads in varying shapes to try out and then experimented with them to build up the filial. A combination of 3 beads and one ring was the answer. Don’t buy quantities of anything until you have checked that the beads thread onto your brazing rods OR buy your brazing rods the size that fits the beads.
The final component came from our local miniatures guild and consisted of thin plastic strips which come off the bottom of blinds. You could use more of the brass metal strips for this if you wanted to but I had used them in another project and once painted black they looked great. Obviously these had to be glued with 2 part epoxy and not soldered!
The bought brass strip with the ready-drilled holes determined the spacing of everything and I used one of those as a jig in order to drill holes in the plastic strips and to drill the receiving holes in the pavement and balcony.
Method:
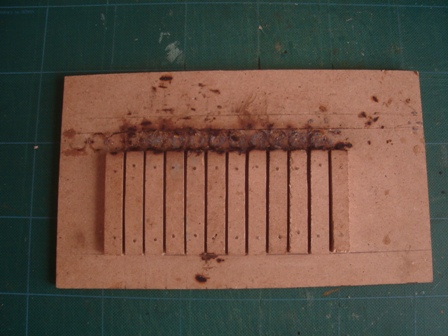
Make a jig out of MDF to hold everything in place while soldering the metal parts. Simply blocks of wood the size of the gaps in the railings separated by the size of the rods. Draw lines along the top as guides for the thin brass strips. Do about 10 repeats and move your railings along as you finish a section.
Cut the brazing rods into approximate lengths making everything slightly longer than the final railings. You will cut them to exact size after soldering.
Use a belt sander to file the top ends of the brazing rods into points. These will form the final point on the filial on top of the beads.
Lay the brazing rods in the jig, points at the top and slide on 2 brass strips. The distance between the 2 brass strips should be the same distance as the gap between the brazing rods thereby making a square, which will eventually receive the rings.
Use a piece of ordinary fine sandpaper to sand all the brazing rods to ensure they are clean in order to help with the soldering process. Finally, wipe with methylated spirits
Solder the brazing rods to the brass strips on the insides of the brass strips. If you want to make your life easier – use very thin solder and a hot soldering iron.
Drop one ring into each square thus formed and solder in place. (The wrong side is uppermost to you and the ring drops to the front.)
Remove from the jig and place on a pile of newspaper. Use an old toothbrush to brush everything vigorously with methylated spirits. This cleans up any remaining flux left over from soldering and leaves everything shiny bright and clean. Wash in soap and water and dry in the warming draw of your oven.
Use 2 part epoxy glue to glue on the 3 beads that make up the filial. First the double ring, then the space ship and finally the crimp. The point sticking out at the top gives the final shape to the filial.
Slide on the plastic strip at the bottom and glue in place from underneath with
2 part epoxy glue.
Cut the brazing rods to the right length at the bottom.
Spray paint everything with one coat of grey primer. Leave to dry. Spray with black gloss paint. Several thin coats will give the best result. DO NOT RUSH. This can take a whole day if you do it correctly. Spray a thin coat – leave to dry for 10 minutes. (set a timer). Repeat.
Position the railings in the pre-drilled holes in the pavement.
Stand back and admire.
Barbara Brear
April 2007